Hướng dẫn - Rebuild lại bộ cài windows 7 - 8 - 10 | Page 10 | VN-Zoom | Cộng đồng Chia Sẻ Kiến Thức Công Nghệ và Phần Mềm Máy Tính

Adblocker detected! Please consider reading this notice.

We've detected that you are using AdBlock Plus or some other adblocking software which is preventing the page from fully loading.

We don't have any banner, Flash, animation, obnoxious sound, or popup ad. We do not implement these annoying types of ads!

We need money to operate the site, and almost all of it comes from our online advertising.

Please add https://vn-z.vn to your ad blocking whitelist or disable your adblocking software.

×

Hướng dẫn Rebuild lại bộ cài windows 7 - 8 - 10

secpol

Rìu Chiến Bạc
Chào bạn. Sau khi mình chạy sysprep trên windows 10 pro xong thì lối tắt của phần mềm đã cài trên desktop đều mất hết và nó hiện về cái ban đầu mình đã xóa bỏ như unikey và revo là sao bạn nhỉ? Cách khắc phục như nào vậy bạn? Cho mình xin file unttend.xml dùng cho all win khi chạy sysprep trong win 10 được không. Thanks
Bạn @Tony2010 có inbox hỏi mình câu hỏi bên trên, nhưng mình thấy câu hỏi này khi làm chắc chắn nhiều bạn sẽ gặp cho nên mình đưa nó ra ngoài này để nhiều bạn cũng biết luôn.
Để các lối tắt vẫn còn giữ nguyên sau khi sysprep thì các bạn có 2 cách:
1. Bạn tạo các lối tắt tại folder C:\Users\Public\Desktop
2. Bạn chạy sysprep để vào chế độ auditmode. Tại môi trường này bạn có thể xóa tài khoản mà bạn vừa dùng để cài, cấu hình Office, cấu hình 1 số thiết lập trong registry, tạo các lối tắt ngoài desktop,... Sau khi làm xong mọi thứ bạn chạy lại sysprep với tùy chọn <copyprofile>true</copyprofile> trong file trả lời tự động. Với tùy chọn này, các lối tắt của bạn vẫn còn giữ nguyên khi bạn triển khai ở các máy sau này. Kể cả khi bạn tạo nhiều tài khoản trên các máy bạn vừa triển khai xong nó vẫn giữ được các thiết lập của bạn.
 

secpol

Rìu Chiến Bạc
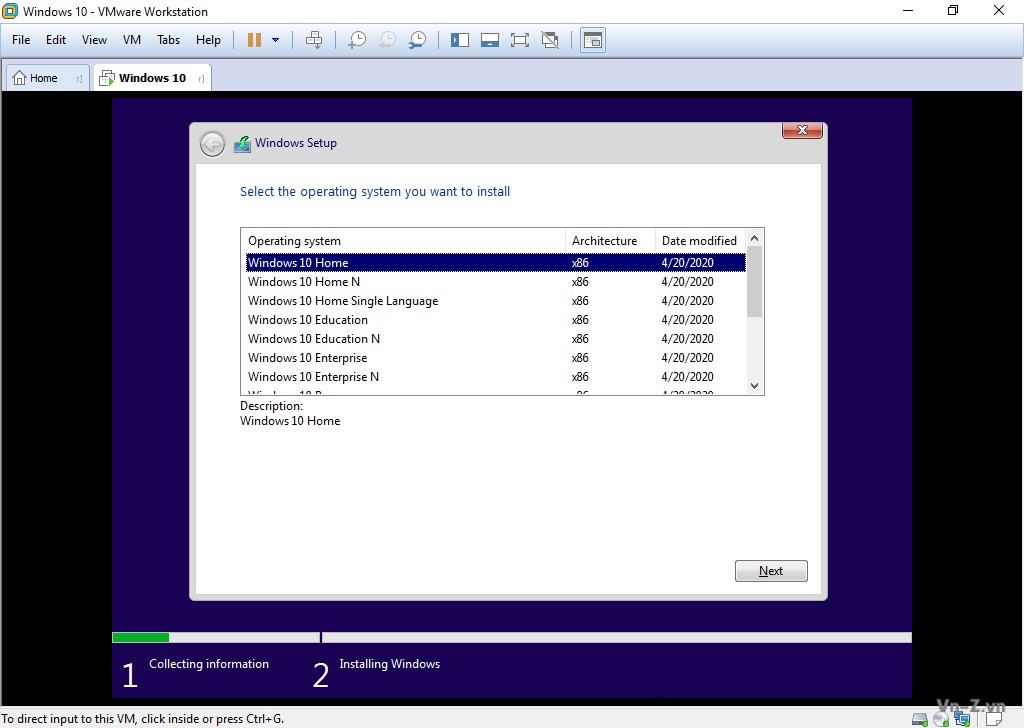
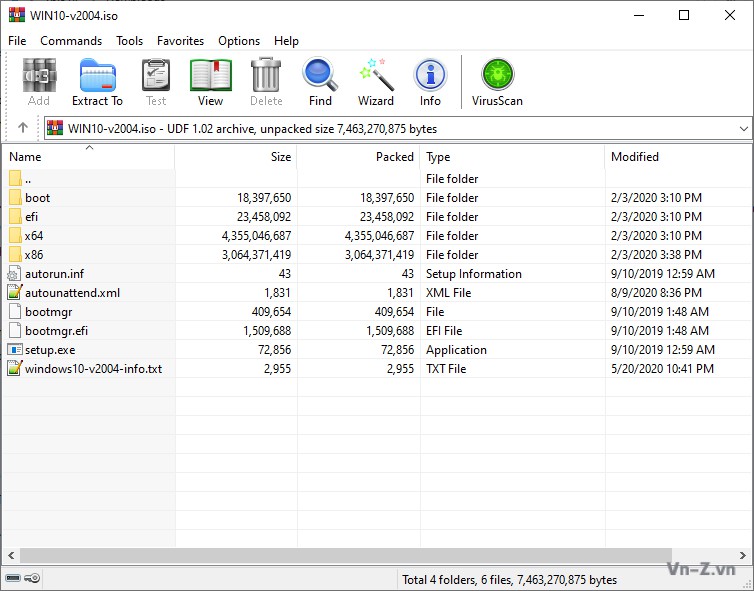
Khi mình cài test windows 10 ( file install.wim của mình có 2 bản là Pro và Home Single) thì khi thêm file trả lời autounatend.xml ( file autounattend.xml mình copy của bạn và đã tách ra như bạn đã gợi ý) copy vào root/usb thì khi cài đến phần chọn phiên bản chỉ còn bản Pro, khi xoá file autounattend.xml đi thì đến bước chọn phiên bản thì nó hiện đủ cả 2.
Còn về phần copy file install.esd vào bộ cài windows 10 mình cài test thì ok, nhưng có một nhược điểm là khi thêm file autounattend.xml thì đến phần nhập key thì nó dừng lại, mình có nhập chục cái key windows 7, 10 đều không được, đành phải skip và cài tiếp.
+ Về vấn đề file autounattend.xml làm cho các version lúc hiện lúc không thì bạn có thể test lại bằng nội dung file bên dưới:
XML:
<?xml version="1.0" encoding="utf-8"?>
<unattend xmlns="urn:schemas-microsoft-com:unattend">
    <settings pass="windowsPE">
        <component name="Microsoft-Windows-International-Core-WinPE" processorArchitecture="amd64" publicKeyToken="31bf3856ad364e35" language="neutral" versionScope="nonSxS" xmlns:wcm="http://schemas.microsoft.com/WMIConfig/2002/State" xmlns:xsi="http://www.w3.org/2001/XMLSchema-instance">
            <InputLocale>1033:00000409</InputLocale>
            <SystemLocale>en-US</SystemLocale>
            <UILanguage>en-US</UILanguage>
            <UserLocale>en-US</UserLocale>
        </component>
        <component name="Microsoft-Windows-International-Core-WinPE" processorArchitecture="x86" publicKeyToken="31bf3856ad364e35" language="neutral" versionScope="nonSxS" xmlns:wcm="http://schemas.microsoft.com/WMIConfig/2002/State" xmlns:xsi="http://www.w3.org/2001/XMLSchema-instance">
            <InputLocale>1033:00000409</InputLocale>
            <SystemLocale>en-US</SystemLocale>
            <UILanguage>en-US</UILanguage>
            <UserLocale>en-US</UserLocale>
        </component>
        <component name="Microsoft-Windows-Setup" processorArchitecture="amd64" publicKeyToken="31bf3856ad364e35" language="neutral" versionScope="nonSxS" xmlns:wcm="http://schemas.microsoft.com/WMIConfig/2002/State" xmlns:xsi="http://www.w3.org/2001/XMLSchema-instance">
            <UserData>
                <AcceptEula>true</AcceptEula>
            </UserData>
        </component>
        <component name="Microsoft-Windows-Setup" processorArchitecture="x86" publicKeyToken="31bf3856ad364e35" language="neutral" versionScope="nonSxS" xmlns:wcm="http://schemas.microsoft.com/WMIConfig/2002/State" xmlns:xsi="http://www.w3.org/2001/XMLSchema-instance">
            <UserData>
                <AcceptEula>true</AcceptEula>
            </UserData>
        </component>
    </settings>
</unattend>
Demo:
test-autounattend-win10-26112020.jpg


test-autounattend-win10-26112020-2.jpg

+ Bạn muốn chèn key vào thì bạn phải dùng đúng bộ source của win7, win 10 thì dùng đúng của win10 thì mới ok. Bạn lưu ý là chỉ dùng key cài đặt. Thường thì không dùng option chèn key trong file unattend.
 
Sửa lần cuối:

ahihi1995

Gà con
+ Về vấn đề file autounattend.xml làm cho các version lúc hiện lúc không thì bạn có thể test lại bằng nội dung file bên dưới:
XML:
<?xml version="1.0" encoding="utf-8"?>
<unattend xmlns="urn:schemas-microsoft-com:unattend">
    <settings pass="windowsPE">
        <component name="Microsoft-Windows-International-Core-WinPE" processorArchitecture="amd64" publicKeyToken="31bf3856ad364e35" language="neutral" versionScope="nonSxS" xmlns:wcm="http://schemas.microsoft.com/WMIConfig/2002/State" xmlns:xsi="http://www.w3.org/2001/XMLSchema-instance">
            <InputLocale>1033:00000409</InputLocale>
            <SystemLocale>en-US</SystemLocale>
            <UILanguage>en-US</UILanguage>
            <UserLocale>en-US</UserLocale>
        </component>
        <component name="Microsoft-Windows-International-Core-WinPE" processorArchitecture="x86" publicKeyToken="31bf3856ad364e35" language="neutral" versionScope="nonSxS" xmlns:wcm="http://schemas.microsoft.com/WMIConfig/2002/State" xmlns:xsi="http://www.w3.org/2001/XMLSchema-instance">
            <InputLocale>1033:00000409</InputLocale>
            <SystemLocale>en-US</SystemLocale>
            <UILanguage>en-US</UILanguage>
            <UserLocale>en-US</UserLocale>
        </component>
        <component name="Microsoft-Windows-Setup" processorArchitecture="amd64" publicKeyToken="31bf3856ad364e35" language="neutral" versionScope="nonSxS" xmlns:wcm="http://schemas.microsoft.com/WMIConfig/2002/State" xmlns:xsi="http://www.w3.org/2001/XMLSchema-instance">
            <UserData>
                <AcceptEula>true</AcceptEula>
            </UserData>
        </component>
        <component name="Microsoft-Windows-Setup" processorArchitecture="x86" publicKeyToken="31bf3856ad364e35" language="neutral" versionScope="nonSxS" xmlns:wcm="http://schemas.microsoft.com/WMIConfig/2002/State" xmlns:xsi="http://www.w3.org/2001/XMLSchema-instance">
            <UserData>
                <AcceptEula>true</AcceptEula>
            </UserData>
        </component>
    </settings>
</unattend>
Demo:

+ Bạn muốn chèn key vào thì bạn phải dùng đúng bộ source của win7, win 10 thì dùng đúng của win10 thì mới ok. Bạn lưu ý là chỉ dùng key cài đặt. Thường thì không dùng option chèn key trong file unattend.
Ok bạn, để mai mình test thử file của bạn.
Mình thấy rebuil lại bộ cài windows thì thấy trình duyệt web có vẻ như nó không được tương thích khi triển khai trên máy thật cho lắm, ví dụ như chrome và cốc cốc khi mở lên thì mình thấy thông báo phải khôi phục lại mặc định ban đầu, khi vào cập nhật phiên bản thì nó toàn báo đã xảy ra lỗi, không biết bạn có bị như mình không?
 

secpol

Rìu Chiến Bạc
Ok bạn, để mai mình test thử file của bạn.
Mình thấy rebuil lại bộ cài windows thì thấy trình duyệt web có vẻ như nó không được tương thích khi triển khai trên máy thật cho lắm, ví dụ như chrome và cốc cốc khi mở lên thì mình thấy thông báo phải khôi phục lại mặc định ban đầu, khi vào cập nhật phiên bản thì nó toàn báo đã xảy ra lỗi, không biết bạn có bị như mình không?
Mình không bị lỗi update chrome sau khi cài xong. Bạn có thể test lại các bản của mình build ra.
 

Tony2010

Rìu Sắt Đôi
Bạn @Tony2010 có inbox hỏi mình câu hỏi bên trên, nhưng mình thấy câu hỏi này khi làm chắc chắn nhiều bạn sẽ gặp cho nên mình đưa nó ra ngoài này để nhiều bạn cũng biết luôn.
Để các lối tắt vẫn còn giữ nguyên sau khi sysprep thì các bạn có 2 cách:
1. Bạn tạo các lối tắt tại folder C:\Users\Public\Desktop
2. Bạn chạy sysprep để vào chế độ auditmode. Tại môi trường này bạn có thể xóa tài khoản mà bạn vừa dùng để cài, cấu hình Office, cấu hình 1 số thiết lập trong registry, tạo các lối tắt ngoài desktop,... Sau khi làm xong mọi thứ bạn chạy lại sysprep với tùy chọn <copyprofile>true</copyprofile> trong file trả lời tự động. Với tùy chọn này, các lối tắt của bạn vẫn còn giữ nguyên khi bạn triển khai ở các máy sau này. Kể cả khi bạn tạo nhiều tài khoản trên các máy bạn vừa triển khai xong nó vẫn giữ được các thiết lập của bạn.
Cho mình xin file unttend.xml với. Và mình có thể gửi bạn file unttend.xml của mình nhờ bạn kiểm tra giúp mình với. Mình thử 5 lần vẫn không được. Còn bị báo lỗi chỗ oobe nữa 😪
 

secpol

Rìu Chiến Bạc
Cho mình xin file unttend.xml với. Và mình có thể gửi bạn file unttend.xml của mình nhờ bạn kiểm tra giúp mình với. Mình thử 5 lần vẫn không được. Còn bị báo lỗi chỗ oobe nữa 😪
Bạn có thể xem file mẫu ở post #1 Mục Bonus2.VIII.1 hoặc bên dưới:

autounattend.xml (x64):
XML:
<?xml version="1.0" encoding="utf-8"?>
<unattend xmlns="urn:schemas-microsoft-com:unattend">
    <settings pass="windowsPE">
        <component name="Microsoft-Windows-International-Core-WinPE" processorArchitecture="amd64" publicKeyToken="31bf3856ad364e35" language="neutral" versionScope="nonSxS" xmlns:wcm="http://schemas.microsoft.com/WMIConfig/2002/State" xmlns:xsi="http://www.w3.org/2001/XMLSchema-instance">
            <InputLocale>1033:00000409</InputLocale>
            <SystemLocale>en-US</SystemLocale>
            <UILanguage>en-US</UILanguage>
            <UserLocale>en-US</UserLocale>
        </component>
        <component name="Microsoft-Windows-Setup" processorArchitecture="amd64" publicKeyToken="31bf3856ad364e35" language="neutral" versionScope="nonSxS" xmlns:wcm="http://schemas.microsoft.com/WMIConfig/2002/State" xmlns:xsi="http://www.w3.org/2001/XMLSchema-instance">
            <UserData>
                <AcceptEula>true</AcceptEula>
            </UserData>
        </component>
    </settings>
</unattend>


unattend.xml (x64):
XML:
<?xml version="1.0" encoding="utf-8"?>
<unattend xmlns="urn:schemas-microsoft-com:unattend">
    <settings pass="generalize">
        <component name="Microsoft-Windows-Security-SPP" processorArchitecture="amd64" publicKeyToken="31bf3856ad364e35" language="neutral" versionScope="nonSxS" xmlns:wcm="http://schemas.microsoft.com/WMIConfig/2002/State" xmlns:xsi="http://www.w3.org/2001/XMLSchema-instance">              
            <SkipRearm>1</SkipRearm>
        </component>
        <component name="Microsoft-Windows-WorkstationService" processorArchitecture="amd64" publicKeyToken="31bf3856ad364e35" language="neutral" versionScope="nonSxS" xmlns:wcm="http://schemas.microsoft.com/WMIConfig/2002/State" xmlns:xsi="http://www.w3.org/2001/XMLSchema-instance">              
            <AllowInsecureGuestAuth>1</AllowInsecureGuestAuth>
        </component>
    </settings>
    <settings pass="specialize">
        <component name="Microsoft-Windows-Deployment" processorArchitecture="amd64" publicKeyToken="31bf3856ad364e35" language="neutral" versionScope="nonSxS" xmlns:wcm="http://schemas.microsoft.com/WMIConfig/2002/State" xmlns:xsi="http://www.w3.org/2001/XMLSchema-instance">
            <RunSynchronous>
                <RunSynchronousCommand wcm:action="add">
                    <Description>Allow Insecure Guest Auth</Description>
                    <Order>1</Order>
                    <Path>cmd /c  reg add HKLM\SYSTEM\CurrentControlSet\Services\LanmanWorkstation\Parameters /v AllowInsecureGuestAuth /t REG_DWORD /d 1 /f</Path>
                </RunSynchronousCommand>
                <RunSynchronousCommand wcm:action="add">
                    <Description>Disable Reserves</Description>
                    <Order>2</Order>
                    <Path>cmd /c  reg add HKLM\SOFTWARE\Microsoft\Windows\CurrentVersion\ReserveManager /v ShippedWithReserves /t REG_DWORD /d 0 /f</Path>
                </RunSynchronousCommand>
                <RunSynchronousCommand wcm:action="add">
                    <Description>Disable Acrylic Background On Logon</Description>
                    <Order>3</Order>
                    <Path>cmd /c  reg add HKLM\SOFTWARE\Policies\Microsoft\Windows\System /v DisableAcrylicBackgroundOnLogon /t REG_DWORD /d 1 /f</Path>
                </RunSynchronousCommand>
                <RunSynchronousCommand wcm:action="add">
                    <Description>Copy To folder</Description>
                    <Order>4</Order>
                    <Path>cmd /c  reg add HKCR\AllFilesystemObjects\shellex\ContextMenuHandlers\{C2FBB630-2971-11D1-A18C-00C04FD75D13} /f</Path>
                </RunSynchronousCommand>
                <RunSynchronousCommand wcm:action="add">
                    <Description>Move To folder</Description>
                    <Order>5</Order>
                    <Path>cmd /c  reg add HKCR\AllFilesystemObjects\shellex\ContextMenuHandlers\{C2FBB631-2971-11D1-A18C-00C04FD75D13} /f</Path>
                </RunSynchronousCommand>
                <RunSynchronousCommand wcm:action="add">
                    <Description>Add This PC Desktop Icon 1</Description>
                    <Order>6</Order>
                    <Path>cmd /c  reg add HKLM\SOFTWARE\Microsoft\Windows\CurrentVersion\Explorer\HideDesktopIcons\ClassicStartMenu /v {871C5380-42A0-1069-A2EA-08002B30309D}.default /t REG_DWORD /d 0 /f</Path>
                </RunSynchronousCommand>
                <RunSynchronousCommand wcm:action="add">
                    <Description>Add This PC Desktop Icon 2</Description>
                    <Order>7</Order>
                    <Path>cmd /c  reg add HKLM\SOFTWARE\Microsoft\Windows\CurrentVersion\Explorer\HideDesktopIcons\NewStartPanel /v {20D04FE0-3AEA-1069-A2D8-08002B30309D} /t REG_DWORD /d 0 /f</Path>
                </RunSynchronousCommand>
                <RunSynchronousCommand wcm:action="add">
                    <Description>Support URL</Description>
                    <Order>8</Order>
                    <Path>cmd /c  reg add HKLM\SOFTWARE\Microsoft\Windows\CurrentVersion\OEMInformation /v Manufacturer /t REG_SZ /d AKIO /f</Path>
                </RunSynchronousCommand>
                <RunSynchronousCommand wcm:action="add">
                    <Description>Support URL</Description>
                    <Order>9</Order>
                    <Path>cmd /c  reg add HKLM\SOFTWARE\Microsoft\Windows\CurrentVersion\OEMInformation /v SupportURL /t REG_SZ /d https://vn-z.vn/tags/manhnd/ /f</Path>
                </RunSynchronousCommand>
                <RunSynchronousCommand wcm:action="add">
                    <Description>Support URL</Description>
                    <Order>10</Order>
                    <Path>cmd /c  reg add HKLM\SOFTWARE\Microsoft\Windows\CurrentVersion\OEMInformation /v SupportHours /t REG_SZ /d 24/7 /f</Path>
                </RunSynchronousCommand>
                <RunSynchronousCommand wcm:action="add">
                    <Description>Support URL</Description>
                    <Order>11</Order>
                    <Path>cmd /c  reg add HKLM\SOFTWARE\Microsoft\Windows\CurrentVersion\OEMInformation /v SupportPhone /t REG_SZ /d "+84 91 664 8537" /f</Path>
                </RunSynchronousCommand>            
            </RunSynchronous>
        </component>
        <component name="Microsoft-Windows-Shell-Setup" processorArchitecture="amd64" publicKeyToken="31bf3856ad364e35" language="neutral" versionScope="nonSxS" xmlns:wcm="http://schemas.microsoft.com/WMIConfig/2002/State" xmlns:xsi="http://www.w3.org/2001/XMLSchema-instance">              
            <copyprofile>true</copyprofile>
        </component>
    </settings>
    <settings pass="oobeSystem">
        <component name="Microsoft-Windows-International-Core" processorArchitecture="amd64" publicKeyToken="31bf3856ad364e35" language="neutral" versionScope="nonSxS" xmlns:wcm="http://schemas.microsoft.com/WMIConfig/2002/State" xmlns:xsi="http://www.w3.org/2001/XMLSchema-instance">
            <InputLocale>1033:00000409</InputLocale>
            <SystemLocale>en-US</SystemLocale>
            <UILanguage>en-US</UILanguage>
            <UILanguageFallback>en-US</UILanguageFallback>
            <UserLocale>en-US</UserLocale>
        </component>
        <component name="Microsoft-Windows-Shell-Setup" processorArchitecture="amd64" publicKeyToken="31bf3856ad364e35" language="neutral" versionScope="nonSxS" xmlns:wcm="http://schemas.microsoft.com/WMIConfig/2002/State" xmlns:xsi="http://www.w3.org/2001/XMLSchema-instance">
            <OOBE>
                <HideEULAPage>true</HideEULAPage>
                <ProtectYourPC>3</ProtectYourPC>
            </OOBE>
            <FirstLogonCommands>
                <SynchronousCommand wcm:action="add">
                    <Order>1</Order>
                    <Description>Open File Explorer to This PC</Description>
                    <CommandLine>reg add "HKEY_CURRENT_USER\Software\Microsoft\Windows\CurrentVersion\Explorer\Advanced" /v LaunchTo /t REG_DWORD /d 1 /f</CommandLine>
                </SynchronousCommand>
                <SynchronousCommand wcm:action="add">
                    <Order>2</Order>
                    <Description>Control Panel 1</Description>
                    <CommandLine>reg add "HKEY_CURRENT_USER\SOFTWARE\Microsoft\Windows\CurrentVersion\Explorer\ControlPanel" /v AllItemsIconView /t REG_DWORD /d 0 /f</CommandLine>
                </SynchronousCommand>
                <SynchronousCommand wcm:action="add">
                    <Order>3</Order>
                    <Description>Control Panel 2</Description>
                    <CommandLine>reg add "HKEY_CURRENT_USER\SOFTWARE\Microsoft\Windows\CurrentVersion\Explorer\ControlPanel" /v StartupPage /t REG_DWORD /d 1 /f</CommandLine>
                </SynchronousCommand>
            </FirstLogonCommands>
            <TaskbarLinks>
                <Link0>%programdata%\Microsoft\Windows\Start Menu\Programs\Google Chrome.lnk</Link0>
                <Link1>%programdata%\Microsoft\Windows\Start Menu\Programs\Word.lnk</Link1>
                <Link2>%programdata%\Microsoft\Windows\Start Menu\Programs\Excel.lnk</Link2>                            
                <Link3></Link3>              
            </TaskbarLinks>
            <RegisteredOrganization>AKIO</RegisteredOrganization>
            <TimeZone>S.E. Asia Standard Time</TimeZone>
        </component>
    </settings>
</unattend>
 

ahihi1995

Gà con
Nó có thể xuất ra .esd, nhưng theo mình thì khi capture image mà làm với máy ảo thì khả năng nén của nó không được cao so với khi chạy trong máy thật. Ngoài ra khi capture như vậy thì phải nhập đầy đủ các thông tin về flag và description luôn. Mà nhập nó nhiều lúc tốn time lắm. Sau khi capture xong, vào trong môi trường windows sửa 1 thể các thông tin còn thiếu nó vẫn tiện hơn.
Bạn có thể cho mình xin lệnh capture ra file .esd được không?
Mình muốn capture ra .esd để giảm dung lượng luôn, chứa capture ra .wim sau đó phải chỉnh sửa rồi lại chuyển từ wim sang esd sẽ mất thời gian
 

secpol

Rìu Chiến Bạc
Bạn có thể cho mình xin lệnh capture ra file .esd được không?
Mình muốn capture ra .esd để giảm dung lượng luôn, chứa capture ra .wim sau đó phải chỉnh sửa rồi lại chuyển từ wim sang esd sẽ mất thời gian
Mình xin phép gửi bạn một số thông tin chính thức của MS về lệnh dism /capture-image:
Captures an image of a drive to a new .wim file. Captured directories include all subfolders and data. You cannot capture an empty directory. A directory must contain at least one file. DISM can also optionally apply and capture extended attributes (EA).

You can capture the image as a Windows image (.wim) file or a set of split Windows image (.swm) files, but this option doesn’t support capturing a virtual hard disk (.vhd/.vhdx) file. See /Capture-FFU if you are looking to capture an FFU.

Syntax:

Mã:
Dism /Capture-Image /ImageFile:<path_to_image_file> /CaptureDir:<source_directory> /Name:<image_name> [/Description:<image_description>]
[/ConfigFile:<configuration_file.ini>] {[/Compress:{max|fast|none}] [/Bootable] | [/WIMBoot]} [/CheckIntegrity] [/Verify] [/NoRpFix] [/EA]

/ConfigFile: Specifies the location of a configuration file that lists exclusions for image capture and compress commands. For more information, see DISM Configuration List and WimScript.ini Files.

/Compress: Specifies the type of compression used for the initial capture operation. The maximum option provides the best compression, but takes more time to capture the image. The fast option provides faster image compression, but the resulting files are larger than those compressed by using the maximum option. This is also the default compression type that is used if you do not specify the argument. The none option does not compress the captured image at all.

/Bootable: Marks a volume image as being a bootable image. This argument is available only for WinPE images. Only one volume image can be marked as bootable in a .wim file.

/CheckIntegrity: Detects and tracks .wim file corruption when used with capture, unmount, export, and commit operations. /CheckIntegrity stops the operation if DISM detects that the .wim file is corrupted when used with apply and mount operations.

/Verify: Checks for errors and file duplication.

/NoRpFix: Disables the reparse point tag fix. A reparse point is a file that contains a link to another file on the file system. If /NoRpFix is not specified, reparse points that resolve to paths outside of the value specified by /ImageFile will not be captured.

/WIMBoot: Use /WIMBoot to append the image with Windows image file boot (WIMBoot) configuration. This only applies to Windows 8.1 images that have been captured or exported as a WIMBoot file. This feature isn't supported in Windows 10.

/EA: Captures extended attributes. The switch must be explicitly specified to capture extended attributes. DISM will capture extended attribute bits if they are set in the components to be captured in the WIM image. If the bits are not set, DISM won't set them. Only the inbox components of CAB packages and drivers will have these extended attribute bits, not the AppX package components or Win32 application components. Extended attributes with prefix “$Kernel.” in name will be skipped because only user mode extended attributes are captured. If you use DISM in Windows 10, version 1607 to capture extended attributes and use an earlier version of DISM to apply the image, the operation will succeed but the extended attributes will not be set to the applied image.

Examples:

Mã:
Dism /Capture-Image /ImageFile:E:\install.wim /CaptureDir:D:\ /Name:"Windows 10 Enterprise Full Software"
/Description:"Windows 10 Enterprise v2004 update 07/2020 by manhnd"
/Compress:max

Lệnh bên trên là lệnh nguyên gốc của MS nói về capture image. Sau khi capture xong thì sẽ dùng lệnh /Apply-Image để triển khai vào hê thống mới hoặc sử dụng Windows Deployment Services trên Windows Server để triển khai trên toàn bộ hệ thống hàng trăm, hàng nghìn,... máy đồng thời.

Khi bạn đưa nó vào trong 1 file ISO thì bạn cần thêm trường Edition (flags) bằng lệnh:
Mã:
Dism /Image:C:\test\offline /Set-Edition:Enterprise
hoặc bằng tool mình có chia sẻ trong video. Khi chỉnh sửa image thì bắt buộc nó phải ở dạng .wim rồi mount nó ra để chỉnh sửa.

Trong lệnh DISM nguyên gốc của MS không có option nén ra .esd (/compress:recovery) mà chỉ có lệnh nén ra .wim (/compress:max|fast|none). Sau khi capture ra .wim file rồi sau đó mới nén lại bằng lệnh:
Mã:
Dism /Export-Image /SourceImageFile: /SourceIndex: /DestinationImageFile: /Compress:recovery

Bạn có thể kiểm tra các thông tin trong .wim file bằng lệnh:
Mã:
Dism /Get-ImageInfo /ImageFile:C:\test\offline\install.wim /index:2


Examples:
Mã:
Index : 2
Name : Windows 10 Enterprise Full Software
Description : Windows 10 Enterprise v2004 update 07/2020 by manhnd
Size : 25,151,605,959 bytes
WIM Bootable : No
Architecture : x64
Hal : acpiapic
Version : 10.0.19041
ServicePack Build : 388
ServicePack Level : 0
Edition : Enterprise
Installation : Client
ProductType : WinNT
ProductSuite : Terminal Server
System Root : WINDOWS
Directories : 32717
Files : 136718
Created : 7/21/2020 - 11:28:12 PM
Modified : 8/7/2020 - 12:53:44 PM
Languages : en-US (Default)


Tài liệu tham khảo:
 
Sửa lần cuối:

ahihi1995

Gà con
Bạn có thể xem file mẫu ở post #1 Mục Bonus2.VIII.1 hoặc bên dưới:

autounattend.xml (x64):
XML:
<?xml version="1.0" encoding="utf-8"?>
<unattend xmlns="urn:schemas-microsoft-com:unattend">
    <settings pass="windowsPE">
        <component name="Microsoft-Windows-International-Core-WinPE" processorArchitecture="amd64" publicKeyToken="31bf3856ad364e35" language="neutral" versionScope="nonSxS" xmlns:wcm="http://schemas.microsoft.com/WMIConfig/2002/State" xmlns:xsi="http://www.w3.org/2001/XMLSchema-instance">
            <InputLocale>1033:00000409</InputLocale>
            <SystemLocale>en-US</SystemLocale>
            <UILanguage>en-US</UILanguage>
            <UserLocale>en-US</UserLocale>
        </component>
        <component name="Microsoft-Windows-Setup" processorArchitecture="amd64" publicKeyToken="31bf3856ad364e35" language="neutral" versionScope="nonSxS" xmlns:wcm="http://schemas.microsoft.com/WMIConfig/2002/State" xmlns:xsi="http://www.w3.org/2001/XMLSchema-instance">
            <UserData>
                <AcceptEula>true</AcceptEula>
            </UserData>
        </component>
    </settings>
</unattend>


unattend.xml (x64):
XML:
<?xml version="1.0" encoding="utf-8"?>
<unattend xmlns="urn:schemas-microsoft-com:unattend">
    <settings pass="generalize">
        <component name="Microsoft-Windows-Security-SPP" processorArchitecture="amd64" publicKeyToken="31bf3856ad364e35" language="neutral" versionScope="nonSxS" xmlns:wcm="http://schemas.microsoft.com/WMIConfig/2002/State" xmlns:xsi="http://www.w3.org/2001/XMLSchema-instance">             
            <SkipRearm>1</SkipRearm>
        </component>
        <component name="Microsoft-Windows-WorkstationService" processorArchitecture="amd64" publicKeyToken="31bf3856ad364e35" language="neutral" versionScope="nonSxS" xmlns:wcm="http://schemas.microsoft.com/WMIConfig/2002/State" xmlns:xsi="http://www.w3.org/2001/XMLSchema-instance">             
            <AllowInsecureGuestAuth>1</AllowInsecureGuestAuth>
        </component>
    </settings>
    <settings pass="specialize">
        <component name="Microsoft-Windows-Deployment" processorArchitecture="amd64" publicKeyToken="31bf3856ad364e35" language="neutral" versionScope="nonSxS" xmlns:wcm="http://schemas.microsoft.com/WMIConfig/2002/State" xmlns:xsi="http://www.w3.org/2001/XMLSchema-instance">
            <RunSynchronous>
                <RunSynchronousCommand wcm:action="add">
                    <Description>Allow Insecure Guest Auth</Description>
                    <Order>1</Order>
                    <Path>cmd /c  reg add HKLM\SYSTEM\CurrentControlSet\Services\LanmanWorkstation\Parameters /v AllowInsecureGuestAuth /t REG_DWORD /d 1 /f</Path>
                </RunSynchronousCommand>
                <RunSynchronousCommand wcm:action="add">
                    <Description>Disable Reserves</Description>
                    <Order>2</Order>
                    <Path>cmd /c  reg add HKLM\SOFTWARE\Microsoft\Windows\CurrentVersion\ReserveManager /v ShippedWithReserves /t REG_DWORD /d 0 /f</Path>
                </RunSynchronousCommand>
                <RunSynchronousCommand wcm:action="add">
                    <Description>Disable Acrylic Background On Logon</Description>
                    <Order>3</Order>
                    <Path>cmd /c  reg add HKLM\SOFTWARE\Policies\Microsoft\Windows\System /v DisableAcrylicBackgroundOnLogon /t REG_DWORD /d 1 /f</Path>
                </RunSynchronousCommand>
                <RunSynchronousCommand wcm:action="add">
                    <Description>Copy To folder</Description>
                    <Order>4</Order>
                    <Path>cmd /c  reg add HKCR\AllFilesystemObjects\shellex\ContextMenuHandlers\{C2FBB630-2971-11D1-A18C-00C04FD75D13} /f</Path>
                </RunSynchronousCommand>
                <RunSynchronousCommand wcm:action="add">
                    <Description>Move To folder</Description>
                    <Order>5</Order>
                    <Path>cmd /c  reg add HKCR\AllFilesystemObjects\shellex\ContextMenuHandlers\{C2FBB631-2971-11D1-A18C-00C04FD75D13} /f</Path>
                </RunSynchronousCommand>
                <RunSynchronousCommand wcm:action="add">
                    <Description>Add This PC Desktop Icon 1</Description>
                    <Order>6</Order>
                    <Path>cmd /c  reg add HKLM\SOFTWARE\Microsoft\Windows\CurrentVersion\Explorer\HideDesktopIcons\ClassicStartMenu /v {871C5380-42A0-1069-A2EA-08002B30309D}.default /t REG_DWORD /d 0 /f</Path>
                </RunSynchronousCommand>
                <RunSynchronousCommand wcm:action="add">
                    <Description>Add This PC Desktop Icon 2</Description>
                    <Order>7</Order>
                    <Path>cmd /c  reg add HKLM\SOFTWARE\Microsoft\Windows\CurrentVersion\Explorer\HideDesktopIcons\NewStartPanel /v {20D04FE0-3AEA-1069-A2D8-08002B30309D} /t REG_DWORD /d 0 /f</Path>
                </RunSynchronousCommand>
                <RunSynchronousCommand wcm:action="add">
                    <Description>Support URL</Description>
                    <Order>8</Order>
                    <Path>cmd /c  reg add HKLM\SOFTWARE\Microsoft\Windows\CurrentVersion\OEMInformation /v Manufacturer /t REG_SZ /d AKIO /f</Path>
                </RunSynchronousCommand>
                <RunSynchronousCommand wcm:action="add">
                    <Description>Support URL</Description>
                    <Order>9</Order>
                    <Path>cmd /c  reg add HKLM\SOFTWARE\Microsoft\Windows\CurrentVersion\OEMInformation /v SupportURL /t REG_SZ /d https://vn-z.vn/tags/manhnd/ /f</Path>
                </RunSynchronousCommand>
                <RunSynchronousCommand wcm:action="add">
                    <Description>Support URL</Description>
                    <Order>10</Order>
                    <Path>cmd /c  reg add HKLM\SOFTWARE\Microsoft\Windows\CurrentVersion\OEMInformation /v SupportHours /t REG_SZ /d 24/7 /f</Path>
                </RunSynchronousCommand>
                <RunSynchronousCommand wcm:action="add">
                    <Description>Support URL</Description>
                    <Order>11</Order>
                    <Path>cmd /c  reg add HKLM\SOFTWARE\Microsoft\Windows\CurrentVersion\OEMInformation /v SupportPhone /t REG_SZ /d "+84 91 664 8537" /f</Path>
                </RunSynchronousCommand>           
            </RunSynchronous>
        </component>
        <component name="Microsoft-Windows-Shell-Setup" processorArchitecture="amd64" publicKeyToken="31bf3856ad364e35" language="neutral" versionScope="nonSxS" xmlns:wcm="http://schemas.microsoft.com/WMIConfig/2002/State" xmlns:xsi="http://www.w3.org/2001/XMLSchema-instance">             
            <copyprofile>true</copyprofile>
        </component>
    </settings>
    <settings pass="oobeSystem">
        <component name="Microsoft-Windows-International-Core" processorArchitecture="amd64" publicKeyToken="31bf3856ad364e35" language="neutral" versionScope="nonSxS" xmlns:wcm="http://schemas.microsoft.com/WMIConfig/2002/State" xmlns:xsi="http://www.w3.org/2001/XMLSchema-instance">
            <InputLocale>1033:00000409</InputLocale>
            <SystemLocale>en-US</SystemLocale>
            <UILanguage>en-US</UILanguage>
            <UILanguageFallback>en-US</UILanguageFallback>
            <UserLocale>en-US</UserLocale>
        </component>
        <component name="Microsoft-Windows-Shell-Setup" processorArchitecture="amd64" publicKeyToken="31bf3856ad364e35" language="neutral" versionScope="nonSxS" xmlns:wcm="http://schemas.microsoft.com/WMIConfig/2002/State" xmlns:xsi="http://www.w3.org/2001/XMLSchema-instance">
            <OOBE>
                <HideEULAPage>true</HideEULAPage>
                <ProtectYourPC>3</ProtectYourPC>
            </OOBE>
            <FirstLogonCommands>
                <SynchronousCommand wcm:action="add">
                    <Order>1</Order>
                    <Description>Open File Explorer to This PC</Description>
                    <CommandLine>reg add "HKEY_CURRENT_USER\Software\Microsoft\Windows\CurrentVersion\Explorer\Advanced" /v LaunchTo /t REG_DWORD /d 1 /f</CommandLine>
                </SynchronousCommand>
                <SynchronousCommand wcm:action="add">
                    <Order>2</Order>
                    <Description>Control Panel 1</Description>
                    <CommandLine>reg add "HKEY_CURRENT_USER\SOFTWARE\Microsoft\Windows\CurrentVersion\Explorer\ControlPanel" /v AllItemsIconView /t REG_DWORD /d 0 /f</CommandLine>
                </SynchronousCommand>
                <SynchronousCommand wcm:action="add">
                    <Order>3</Order>
                    <Description>Control Panel 2</Description>
                    <CommandLine>reg add "HKEY_CURRENT_USER\SOFTWARE\Microsoft\Windows\CurrentVersion\Explorer\ControlPanel" /v StartupPage /t REG_DWORD /d 1 /f</CommandLine>
                </SynchronousCommand>
            </FirstLogonCommands>
            <TaskbarLinks>
                <Link0>%programdata%\Microsoft\Windows\Start Menu\Programs\Google Chrome.lnk</Link0>
                <Link1>%programdata%\Microsoft\Windows\Start Menu\Programs\Word.lnk</Link1>
                <Link2>%programdata%\Microsoft\Windows\Start Menu\Programs\Excel.lnk</Link2>                           
                <Link3></Link3>             
            </TaskbarLinks>
            <RegisteredOrganization>AKIO</RegisteredOrganization>
            <TimeZone>S.E. Asia Standard Time</TimeZone>
        </component>
    </settings>
</unattend>
Bạn cho mình hỏi, có cách nào để file tự động trả lời nó vào thẳng trong windows không bạn, ví dụ như user không đặt mật khẩu thì lúc khởi động Windows lên nó bắt mình tạo mật khẩu mới hoặc phải ấn enter thì nó mới next được. Liệu có thể cấu hình file trả lời để nó bỏ qua bước nhập mật khẩu kia không?
 

secpol

Rìu Chiến Bạc
13/12/2020:
 

ngocthu90

Rìu Sắt
Mình có làm file ISO win 7 bản Pro và Ultimate thì đến đoạn chọn ngôn ngữ nó chỉ hiện tiếng Anh mà không thấy tiếng Trung mặc dù mình đã làm theo cách của bạn,bản trước(win7) mình tạo không vấn đề gì,hay là vấn đề ở file trả lời tự động hả bạn?
 

ngocthu90

Rìu Sắt
mình bổ sung thêm là kiểm tra trên máy ảo thì có hiển thị lựa chọn ngôn ngữ,chuyển sang máy thật thì lại hiển thị mỗi tiếng Anh.
 

demiss2010

Gà con
@secpol ơi. mình có cài thử Zalo PC vào. cũng như các phần mềm khác đều ok cả,. Sau khi capture xong thì chỉ riêng mỗi Zalo không mở được. không thấy cài đặt luôn
 

secpol

Rìu Chiến Bạc
@secpol ơi. mình có cài thử Zalo PC vào. cũng như các phần mềm khác đều ok cả,. Sau khi capture xong thì chỉ riêng mỗi Zalo không mở được. không thấy cài đặt luôn
Chào bạn!

Với Zalo thì nó hơi khác so với các phần mềm khác một chút. Khi cài mặc định bằng file .exe tải về từ trang chủ thì mặc định nó sẽ cài vào C:\Users\user-account\AppData\Local\Programs\Zalo. Với đường dẫn này thì khi sysprep như mình có hướng dẫn là xóa tài khoản cài ban đầu trong mode audit thì Zalo chắc chắn sẽ bị lỗi. Phân tích kỹ hơn thì bạn sẽ thấy file cài Zalo này thực ra nó chỉ là 1 file .exe nén. Để lấy ra file chạy Zalo bạn theo tác theo các bước bên dưới:
  1. Bạn xả nén file .exe tải về từ trang chủ vào 1 thư mục bằng 7-zip.
  2. Truy cập vào \ZaloSetup-20.12.1\$PLUGINSDIR và xả nén tiếp tục file app-32.7z ra 1 folder bằng 7-zip (ZaloSetup-20.12.1 chính là tên file .exe bạn tải từ trang chủ về, nó sẽ thay đổi tùy theo phiên bản).
  3. Truy cập vào bên trong folder app-32 bạn vừa xả nén ra thì bạn sẽ thấy toàn bộ file chạy mà Zalo sử dụng.
  4. Copy file Uninstall Zalo.exe từ folder ZaloSetup-20.12.1 vào folder app-32.
  5. Bạn mang folder app-32 này đi bất kỳ chỗ nào thì Zalo đều chạy được và có thể đổi tên tùy ý folder này.
  6. File Zalo chạy nó nằm ở đường dẫn \ZaloSetup-20.12.1\$PLUGINSDIR\Zalo-PC\Zalo-20.12.1\Zalo.exe (tên folder app-32 mình đã đổi thành Zalo-PC).
Done!

Với cách làm như trên, mỗi khi user mới được tạo ra thì Zalo đều được chạy từ 1 thư mục duy nhất. Khi user chạy Zalo lần đầu nó sẽ tạo ra 2 folder C:\Users\user-account\AppData\Local\ZaloPCC:\Users\user-account\AppData\Roaming\ZaloApp.

Note: Cách làm này chỉ làm ở 1 user mới. Nếu bạn làm ở user đã cài Zalo rồi (hoặc đã gỡ Zalo) thì khi chạy bạn sẽ thấy nó không hiển thì biểu tượng Zalo ở phía bên dưới mà thay vào đó là 1 biểu tượng ô trắng.

Chúc bạn thành công ! :)
 

demiss2010

Gà con
Chào bạn!

Với Zalo thì nó hơi khác so với các phần mềm khác một chút. Khi cài mặc định bằng file .exe tải về từ trang chủ thì mặc định nó sẽ cài vào C:\Users\user-account\AppData\Local\Programs\Zalo. Với đường dẫn này thì khi sysprep như mình có hướng dẫn là xóa tài khoản cài ban đầu trong mode audit thì Zalo chắc chắn sẽ bị lỗi. Phân tích kỹ hơn thì bạn sẽ thấy file cài Zalo này thực ra nó chỉ là 1 file .exe nén. Để lấy ra file chạy Zalo bạn theo tác theo các bước bên dưới:
  1. Bạn xả nén file .exe tải về từ trang chủ vào 1 thư mục bằng 7-zip.
  2. Truy cập vào \ZaloSetup-20.12.1\$PLUGINSDIR và xả nén tiếp tục file app-32.7z ra 1 folder bằng 7-zip (ZaloSetup-20.12.1 chính là tên file .exe bạn tải từ trang chủ về, nó sẽ thay đổi tùy theo phiên bản).
  3. Truy cập vào bên trong folder app-32 bạn vừa xả nén ra thì bạn sẽ thấy toàn bộ file chạy mà Zalo sử dụng.
  4. Copy file Uninstall Zalo.exe từ folder ZaloSetup-20.12.1 vào folder app-32.
  5. Bạn mang folder app-32 này đi bất kỳ chỗ nào thì Zalo đều chạy được và có thể đổi tên tùy ý folder này.
  6. File Zalo chạy nó nằm ở đường dẫn \ZaloSetup-20.12.1\$PLUGINSDIR\Zalo-PC\Zalo-20.12.1\Zalo.exe (tên folder app-32 mình đã đổi thành Zalo-PC).
Done!

Với cách làm như trên, mỗi khi user mới được tạo ra thì Zalo đều được chạy từ 1 thư mục duy nhất. Khi user chạy Zalo lần đầu nó sẽ tạo ra 2 folder C:\Users\user-account\AppData\Local\ZaloPCC:\Users\user-account\AppData\Roaming\ZaloApp.

Note: Cách làm này chỉ làm ở 1 user mới. Nếu bạn làm ở user đã cài Zalo rồi (hoặc đã gỡ Zalo) thì khi chạy bạn sẽ thấy nó không hiển thì biểu tượng Zalo ở phía bên dưới mà thay vào đó là 1 biểu tượng ô trắng.

Chúc bạn thành công !
Cảm ơn bạn. hiện tại vấn đề này mình xử lý đc rồi. nay phát sinh thêm 1 lỗi Sau khi capture xong đóng gói hoàn chỉnh thành ISO. mình tạo usb boot để cài trên các máy khác thì có tình trạng khi đến chỗ chọn phiên bản cài đặt thì không tìm thấy phiên bản nào để chọn. cụ thể là nội dung Operating system "No images are available" .mong bạn hỗ trợ giúp mình. xin cảm ơn.
 

secpol

Rìu Chiến Bạc
Cảm ơn bạn. hiện tại vấn đề này mình xử lý đc rồi. nay phát sinh thêm 1 lỗi Sau khi capture xong đóng gói hoàn chỉnh thành ISO. mình tạo usb boot để cài trên các máy khác thì có tình trạng khi đến chỗ chọn phiên bản cài đặt thì không tìm thấy phiên bản nào để chọn. cụ thể là nội dung Operating system "No images are available" .mong bạn hỗ trợ giúp mình. xin cảm ơn.
Bạn xem lại trong video phần III ở đoạn mình bắt đầu capture image nhé. :)
 

demiss2010

Gà con
Bạn xem lại trong video phần III ở đoạn mình bắt đầu capture image nhé.
Mình xem đi xem lại và làm đúng như video rồi. mình chạy thử file trên máy ảo thì ok ngon lành. tạo usb boot cài cho 2 máy laptop thì báo lỗi như trên. cấu hình 2 laptop 1 con i7-7th , 1 con i5-10th. liệu đây có phải nguyên nhân không.


Top